
How do you make a photography portfolio from scratch?
The photographs are already there: in a Lightroom collection, on a drive, or among the images you keep showing friends. Making a portfolio is the chance to see what they become together. Start with one series, find its order, and give it a page you can share.
Quick answer
Choose the purpose, shortlist your photographs, and group the selection into galleries. In ISO100, arrange each sequence, choose covers and a layout, then preview and publish. Start with one finished gallery and add more as the portfolio develops.
Set up portfolio brandingIn this guide
1. Decide what you want to show
Finish this sentence: "After viewing my portfolio, I want someone to understand that I photograph..." The answer can be a subject, method, place, concern, capability, or combination. It does not have to describe a career.
Picture the person opening the link. A classmate looking at a project has different context from an editor considering a commission. Decide what you hope they will do next: explore another series, get in touch, or simply remember the photographs.
If the answer takes you in several directions, plan separate galleries. Each can offer a clear introduction without forcing all your work into the same edit.
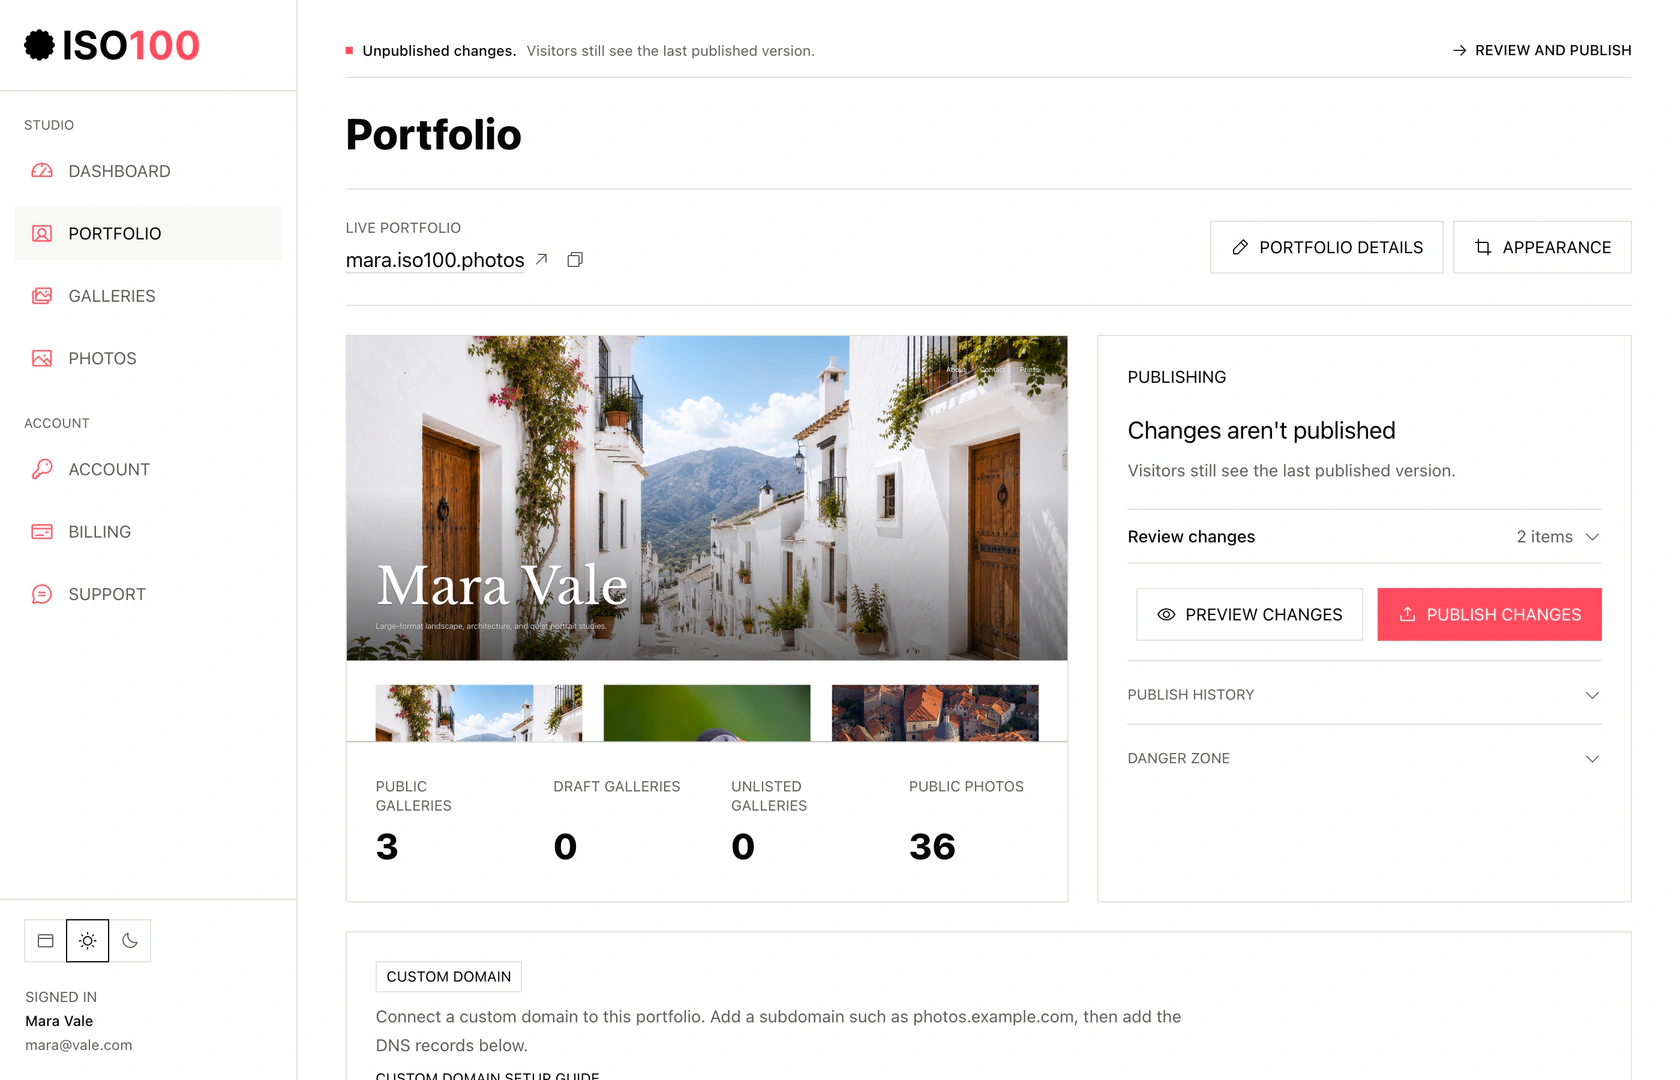
- Use Portfolio details for identity and contact information, and Appearance for the cover and layout.
- Preview changes before publishing. The last published version stays live while you edit.
2. Make a generous shortlist
Gather candidates before designing the site. Include photographs that advance the brief, including quieter images that may lack dramatic light or an immediate individual impact.
Use a temporary collection in your editing software or a folder, and start with roughly two to three times the number you expect to publish. See the thumbnails together so repeated framing, colors, and subjects become easier to notice.
Leave the shortlist overnight. The next day, a quieter scene-setting photograph may feel more necessary than the image you were most excited to make.
3. Cut in three passes
Make the edit in three passes so each decision stays manageable. First check the photographs themselves, then their place in the project, and finally how they work together.
- Pass one, quality: remove accidental misses, files that do not hold up at useful display size, and inferior near-duplicates.
- Pass two, relevance: remove good photographs that do not support this portfolio's brief.
- Pass three, contribution: ask what each remaining image adds that no other image supplies.
- When two images serve the same purpose, keep the one with a clearer subject, stronger tension, or better relationship to its neighbors.
- Place uncertain images in a separate holding collection rather than keeping them in the public edit by default.
4. Group the work into galleries
A gallery should make one promise and keep it. Useful organizing principles include a project, story, place, subject, event, period, assignment type, or sustained visual question.
Describe each gallery in a sentence before naming it. Similar descriptions may point to one stronger collection; unrelated subjects may need their own spaces. A specific name such as “Western District Winter” tells someone more than “Gallery Two.”
A photograph can appear in more than one gallery when it serves a different purpose in each. Check that the second appearance adds context instead of merely filling space.
5. Arrange the sequence
The first image invites the viewer in; the next few prove that the set is worth continuing; the middle develops it; and the final image determines what lingers. Sequence is not simply strongest to weakest.
Move small thumbnails around so fine detail does not distract you from the overall shape. A change of distance, gesture, color, or orientation can lead naturally from one frame to another. Give similar dramatic images some space between them.
Try two endings: one that resolves the series and one that leaves a question. Look through the whole sequence before deciding which feeling you want someone to take away.
6. Add covers and context
A cover is a promise about the gallery. A description or caption should supply information the photograph cannot communicate alone.
Choose a photograph that represents the series and check how it crops on a phone as well as a desktop. A striking outlier can attract attention but leave someone expecting a different body of work.
Keep your introduction specific to what you photograph. Use captions for names, places, dates, or circumstances that change how an image is understood, and add equipment details when the process is part of the interest.
7. Keep your portfolio branding simple
Use your name or logo to make the portfolio feel like yours. In ISO100, Portfolio → Branding brings your logo, browser icon, and optional photo watermarks together. Keep them quiet enough for the photographs to lead.
Keep browser icons simple enough to recognize at a small size. If you use watermarks, compare them on light and dark photographs and keep them unobtrusive. Covers, grids, and downloads stay watermark-free.
8. Preview, publish, and review
Do not ask only whether people like it. Ask questions that expose whether the editorial decisions are working.
- Review the homepage and every gallery at phone and desktop widths.
- Check cover focus, text contrast, portrait-image scale, landscape-image scale, navigation, and contact details.
- Show the preview to someone who was not involved in the shoots, or share the published gallery when it is ready.
- Ask what kind of photographer they think you are, which image they remember, where the sequence dragged, and what they would click next.
- Fix shared misunderstandings, publish the final URL, and schedule a review in three months.
Work through the next decision.
The guides below add examples, working ranges, and methods for individual parts of the process.
Choosing your photographs
Build a shortlist, remove weaker frames, and ask for useful feedback.
Finding the right image count
Use practical editing ranges to keep each gallery focused.
Sequencing a portfolio
Shape an opening, vary the pace, and finish with purpose.
Combining photography genres
Group different kinds of work into galleries visitors can understand.
Portfolio essentials
Bring together galleries, context, and contact details in a clear website.
Writing your photographer bio
Explain your work in a short, straightforward introduction.
Before you publish
Review your images, covers, links, and mobile layout before sharing.
Image sizes for the web
Balance pixel dimensions, file size, and image quality.
Turn your selection into a published portfolio.
Upload your photographs to ISO100, arrange the galleries, and choose a layout. Preview the result, then publish your portfolio for free.
Common questions
How do I make a photography portfolio with no experience?
Start with one small, coherent project or subject you have photographed repeatedly. Select 12 to 20 images, arrange them as a complete sequence, write a short factual description, and publish the finished gallery without imitating a broad commercial portfolio.
What should I include in a photography portfolio?
Include selected photographs that support a clear purpose, gallery covers that represent their sets, deliberate sequences, a short biography or project description where useful, contact details, and a public link that works on phones and larger screens.
How long does it take to make a photography portfolio?
The website can be assembled in an afternoon once the edit is ready. Selection and sequencing often take longer. Plan at least two editing sessions with time between them so attachment to recent photographs does not control the final cut.
Choose the next topic.
Choosing your photographs
Build a shortlist, remove weaker frames, and ask for useful feedback.
Finding the right image count
Use practical editing ranges to keep each gallery focused.
Sequencing a portfolio
Shape an opening, vary the pace, and finish with purpose.